


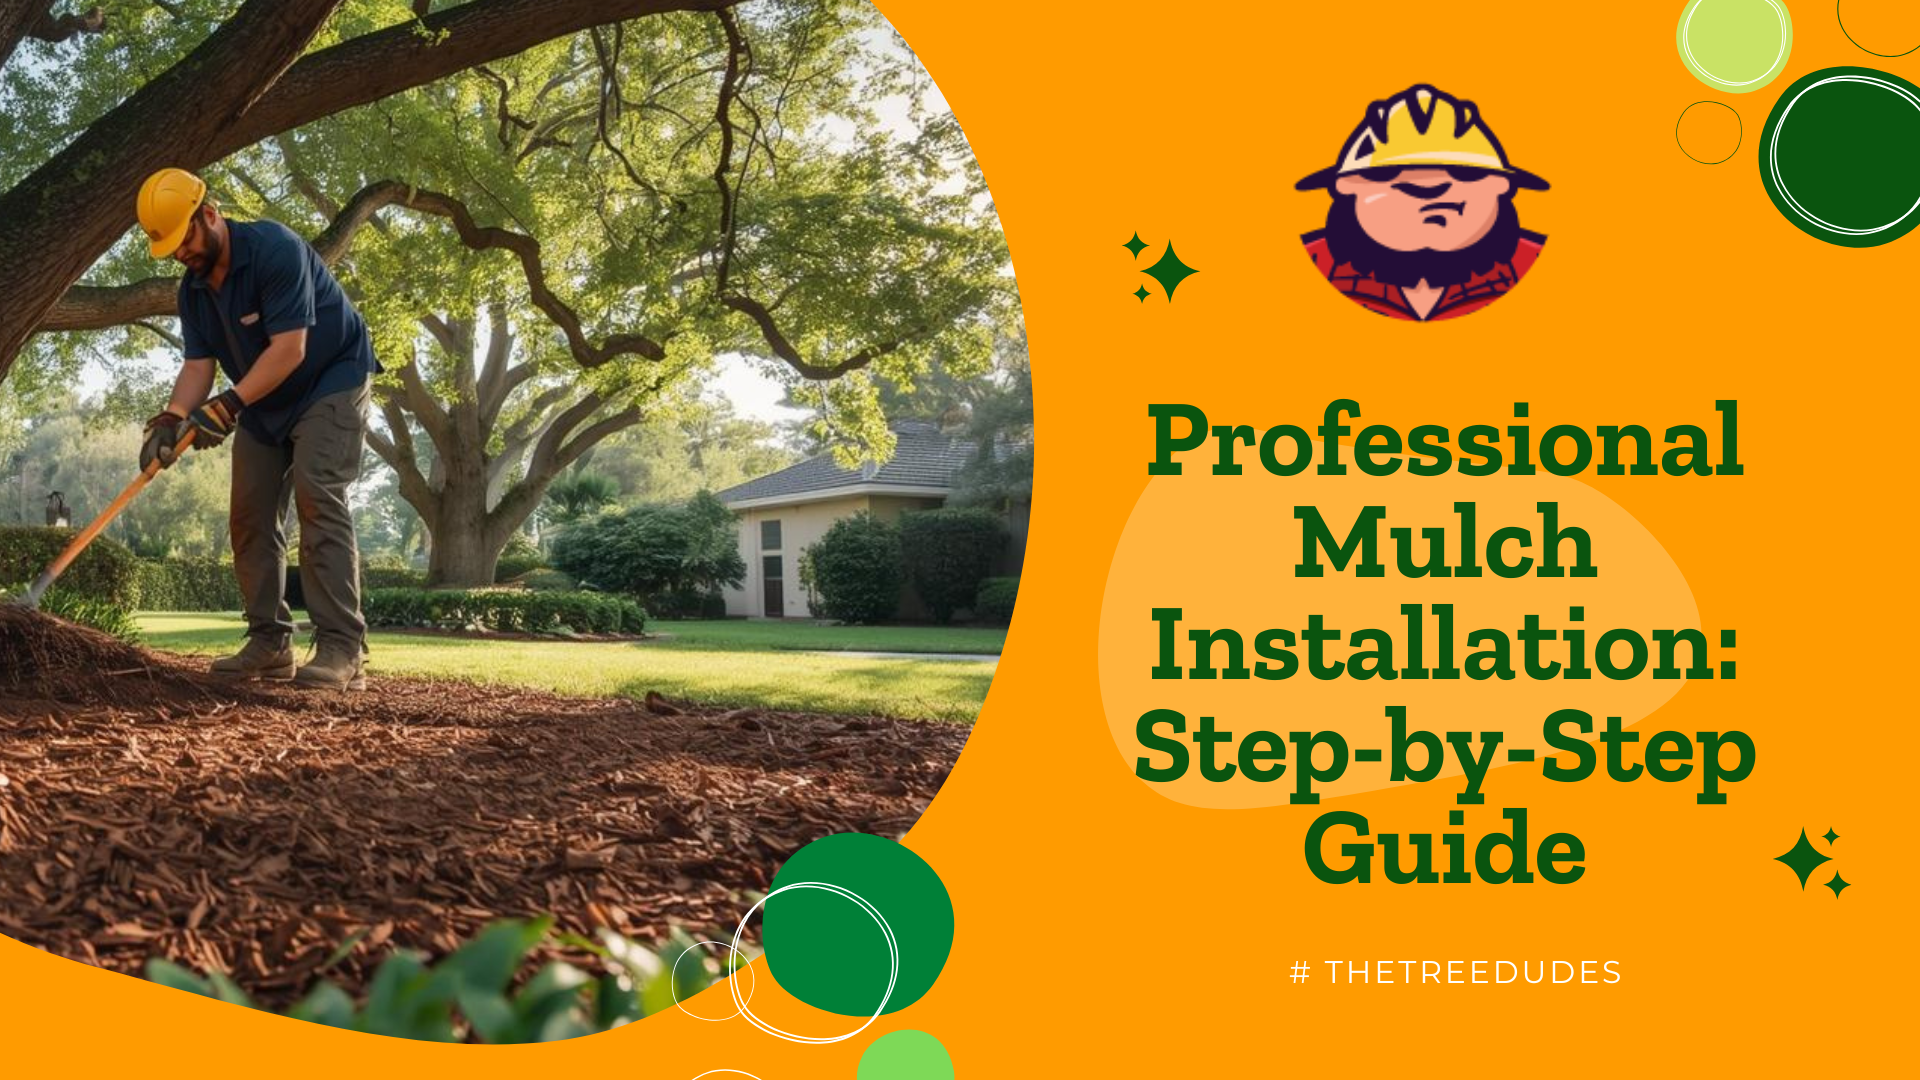
Everyone in a community knows that first impressions are everything. Lush tropical palms and neatly mulched flowerbeds can give a neighborhood a resort-level appeal. Behind that pristine curb appeal is often a well-organized plan, not just a few bags of mulch tossed around. This guide breaks down the process of professional mulch installation step by step, tailored specifically for the warm South Florida climate.
Understanding Mulch and Its Importance in South Florida
Every successful project starts with understanding the materials and their purpose. Mulch is any material spread over the soil as a protective cover. In the context of South Florida gardening, mulch is particularly valued because of the region’s climate extremes. The sun can be fierce, tropical storms can dump torrents of rain, and the soil is often sandy and prone to drying out or eroding. Laying down mulch in these conditions is s a practical strategy to protect and nurture plants.
Why Mulch Matters in a Warm Climate
In a hot, subtropical climate, the benefits of mulch truly shine. A proper layer of mulch acts as a shield against the elements. It dramatically reduces moisture loss from the soil, which means a garden bed stays damp longer after watering or rain. Mulch also provides weed control by blocking sunlight from reaching weed seeds. Under a thick blanket, weeds struggle to germinate, saving the gardener hours of tedious plucking.
Another big plus is soil temperature regulation. During scorching summer days, mulch keeps the soil beneath cooler, protecting tender root systems from overheating. Conversely, when the rare cold night or winter breeze rolls in, mulch helps keep the soil warmer, insulating roots against temperature swings. On top of all that, organic mulches slowly decompose and enrich the soil. As months go by, a layer of wood chips or leaves breaks down into organic matter, improving soil structure and fertility, which is a blessing for South Florida’s often sandy, nutrient-poor ground.
Finally, mulch plays an important role in preventing erosion. In heavy rains, instead of soil washing away, the mulch takes the brunt of the force, keeping precious topsoil in place. All these benefits make mulching an essential practice for anyone looking to maintain a healthy, low-maintenance landscape in South Florida.
Organic vs. Inorganic Mulch
Mulch comes in many forms, but it broadly falls into two categories: organic mulch, derived from natural, once-living materials, and inorganic mulch, made from non-living materials. Neither is “wrong,” but they serve different purposes, and it is important to make an informed choice, especially for South Florida conditions.
Organic Mulches
These include wood chips, bark nuggets, pine straw, shredded leaves, coconut coir, straw, and even grass clippings. Organic mulch is favored by gardeners who want to improve their soil over time. In South Florida’s climate, organic mulches break down relatively quickly, which means they do need to be topped up more often, typically every 8-12 months for wood-based mulches. The big advantage is that as they decompose, they add nutrients and organic matter to the soil, feeding beneficial microbes and creating a richer soil environment for roots.
For example, shredded cypress mulch and pine bark are popular in South Florida gardens. Cypress mulch is known for its long-lasting properties and contains natural oils that can even deter pests, making it a popular choice for those concerned about insect infestations. Pine bark or pine nugget mulch is lightweight and aromatic. It also helps slightly acidify the soil as it breaks down, which can benefit acid-loving ornamentals.
Other great organic options include eucalyptus mulch, prized for its pest-resistant, pleasant-smelling oils and attractive reddish tint, and Melaleuca mulch, which is made from an invasive tree in Florida and thus is both eco-friendly and very rot-resistant. Using organic mulch aligns with a sustainable approach: it recycles natural materials and continuously feeds the earth, perfect for an eco-conscious gardener.
Inorganic Mulches
These include gravel, pebbles, river rock, and recycled rubber chips. Inorganic mulches do not break down, so they rarely need replacement. A plus if someone wants a more permanent solution. They are often used in high-traffic areas or for a specific decorative look. In South Florida, however, gardeners should use inorganic mulches with caution. Rocks and gravel can absorb and radiate a lot of heat, potentially raising soil temperatures around plants. They also will not improve the soil or help it retain moisture as effectively as organic matter.
Rubber mulch, made from recycled tires, is long-lasting and bouncy, commonly used under playgrounds, and it blocks weeds and holds moisture reasonably well. But it can sometimes give off an odor in high heat and, again, does not nourish the soil. If an inorganic mulch is used in a South Florida landscape, it is often placed over a weed barrier fabric to prevent the rocks from sinking into the sandy earth, and one must be mindful of the extra heat it might introduce.
Preparing for a Mulch Installation Project
Diving headfirst into spreading mulch is tempting, but preparation is key to a smooth installation. Taking the time to plan and set up properly will make the job easier and ensure the mulch does its job effectively. Here is how a smart gardener preps for mulching day:
Measuring the Area and Calculating Mulch Needs
Before buying mulch, it is important to figure out how much is needed. Too little, and the coverage will be patchy and ineffective. Too much, and money is wasted, and piles of excess mulch will sit around. Figuring out how much mulch you need is not too complicated, and once you get the hang of it, it feels pretty great. First, measure the length and width of each garden bed or area to be mulched, in feet, to get the square footage. For curved or circular beds, estimate the average length and width, or measure in sections. For example, if a planting bed is 10 feet long and 5 feet wide, that is 50 square feet.
Next, decide on the desired depth of mulch. For South Florida, the sweet spot is generally a 2–3 inch layer of organic mulch across the bed. Less than 2 inches may let weeds through and will not insulate well. More than about 4 inches can lead to problems like root suffocation or mold due to excess moisture. Most experts recommend around 3 inches for optimum results in a warm climate.
Now, to calculate quantity: mulch is often sold by the cubic foot (bags) or cubic yard (bulk). As a rule of thumb, 1 cubic yard (27 cubic feet) of mulch will cover roughly 100 square feet at a 3-inch depth. Another way to put it: for each 100 sq. ft. area, about a yard of mulch is needed to reach 3 inches deep. If buying bagged mulch, note the volume per bag, commonly 2 cubic feet or 3 cubic feet per bag, and divide the total cubic feet needed by that number. For instance, covering a 150 sq. ft. bed with a 3-inch layer: about 1.35 cubic yards is required, which is roughly 36 cubic feet.
Doing this math ahead of time ensures the project will not stall due to a mulch shortage. It also helps avoid over-ordering. Nobody wants a giant surplus pile of mulch sitting in the driveway under the Florida sun, inviting insects or creating an eyesore.
Sourcing Mulch: Bulk vs. Bagged
Where and how to get mulch is the next logistical consideration. In South Florida, gardeners have a few options: buying bagged mulch from garden centers or home improvement stores, ordering bulk mulch from a landscaping supplier, or even obtaining free recycled mulch from local municipal programs or tree trimming services. Each option has its merits:
Bagged Mulch
Convenient and easy to handle, bags typically come in 2 or 3-cubic-foot sizes. They can be loaded into a car trunk and carried to the garden one by one, which is great if the mulching project is small or if the gardener does not want the mess of a huge pile. Bagged products also often have consistent texture and color. Some are even dyed red, black, or brown for decorative effect. In South Florida, bagged mulch is widely available year-round. The downside is cost. Per cubic foot, bagged is usually more expensive than bulk. But for a modest flower bed or two, the difference might be negligible and worth the convenience.
Bulk Mulch
Buying in bulk means purchasing loose mulch by the cubic yard. Local landscape supply companies or garden centers will deliver a heap of mulch to the property. Bulk is economical for larger projects. If a yard or more of mulch is needed, it often costs significantly less per unit than buying the equivalent in bags. Many South Florida landscapers prefer bulk for its value and the ease of shoveling it out. However, it does require the homeowner to have space for the pile and to use all that mulch relatively quickly. Also, quality can vary. One should use a reputable supplier to ensure the mulch is clean and matches the desired type.
Recycled Free Mulch
A fantastic sustainability tip: many counties and cities in South Florida offer free mulch made from recycled yard waste, or local tree trimming companies like ours might be willing to drop off a truckload of wood chips at little to no cost. This kind of mulch is usually an unprocessed mix of shredded tree branches, leaves, and trunks, not as uniform or pretty as store-bought mulch, but very effective as an organic groundcover. It tends to be quite fresh, possibly even green, so it is best used around trees, shrubs, or pathways rather than delicate flower beds with seedlings.
If using this, one might let it sit and “cook” for a few weeks so it ages a bit, or at least avoid piling it thick right against plant stems, since fresh mulch can heat up as it composts. The obvious advantage is cost and the eco-friendly aspect of recycling local materials.
Assembling Tools and Materials
Having the right tools on hand will make mulch installation efficient and even enjoyable. A true garden DIYer in South Florida will lay out her tools beforehand like a pro. Here is what is typically needed:
Guantes
A sturdy pair of gardening gloves is essential. Mulch is rough and can give plenty of splinters or scrapes. In warm climates, there might also be insects lurking, such as South Florida fire ants or palmetto bugs, so gloves protect the hands while digging around.
Garden Cart
If working with bulk mulch or a lot of bags, a wheelbarrow saves endless trips back and forth. It is the workhorse for hauling big scoops of mulch from the pile to each bed.
Garden Fork or Shovel
To load bulk mulch into the wheelbarrow, a pitchfork with broad tines is extremely helpful, as it spears into the loose chips easily. A flat shovel can also do the job for finer mulch. If using bagged mulch, these might be less needed except for some light soil work.
Garden Rake
A bow rake with stiff metal spikes is great for spreading mulch after you have dumped it on the bed. It allows one to push and pull the mulch into an even layer. A leaf rake can also be used to finish off or gently spread lighter mulch like straw, but a metal rake gives more control for wood chips.
Edging tool or Spade
If you need to create a distinct separation between your garden bed and the lawn, using either a half-moon edging tool or a sharp flat spade can be incredibly effective. The half-moon edging tool, with its curved blade, makes it easier to carve a precise line into the soil, ensuring that the edges are smooth and well-defined. On the other hand, a sharp flat spade can also be utilized to cut into the soil, effectively slicing through grass and roots to establish a clear boundary.
Utility Knife or Scissors
To efficiently and tidily open mulch bags, having a sharp knife on hand can be incredibly useful. This tool allows you to slice through the tough packaging with ease, preventing the mess that often comes with tearing open bags. If you are working with landscape fabric, a utility knife becomes invaluable, enabling you to accurately cut the material to the desired dimensions for your project.
Garden Hose
This may not be immediately obvious, but having water ready is beneficial for several reasons. Sometimes, lightly watering the soil before mulching is advised to ensure the ground is moist, as you would not want to lock in dry soil under mulch. Plants would be thirstier. Additionally, watering after the mulch is laid helps settle it into place. So, a hose nozzle with a spray setting or a watering can should be nearby.
Trash Bags or Tarp
A tarp is invaluable if you are getting bulk mulch dropped off. It can be placed on the driveway so cleanup is easier, and it prevents stains or mess. A tarp is also good for throwing weeds or old mulch on as you clear beds, to drag them away later. Heavy-duty trash bags work if you plan to bag up old mulch or debris for disposal. South Florida municipalities often allow yard waste disposal, but check local rules if needed.
Sun Protection and Attire
The person installing mulch should wear breathable old clothes that she does not mind getting dirty, closed-toe shoes, for shovel safety and fire ant protection, and perhaps a hat and sunscreen. Mulching can be a sweaty endeavor under the Florida sun, so it is wise to do it in early morning or late afternoon when it is cooler, and have some cold water on hand to stay hydrated.
Clearing and Prepping the Garden Bed
Preparation of the area is arguably the most labor-intensive part of mulching, but it is absolutely crucial. A well-prepared bed not only looks cleaner, but it also ensures the mulch layer can do its job unhindered. Here is how to get the site ready in a stepwise fashion:
Remove Weeds and Debris
Begin by pulling out any weeds in the area. Every stray weed or patch of grass left behind is an enemy that will poke through the new mulch layer. In South Florida’s climate, weeds grow aggressively year-round, so this step might require some persistence. It helps to do it after a rain or irrigation when the soil is softer, making it easier to yank out roots completely. For weeds that are stubborn or have deep roots, a weeding tool or hand trowel can dig them out.
Also, remove any leaf litter, fallen palm fronds, sticks, or old mulch that is matted down. If there was a previous layer of mulch and it has decomposed into a thin layer of composted material, it is actually fine to leave that and even mix it into the soil lightly. But if old mulch is diseased or piled up too thick against plant stems, it should be thinned out or removed to start fresh. Essentially, the bed should be as bare and clean as possible, with just soil visible, and no tall weeds or grass.
Trim and Prune Edges
If the bed borders grass or other plants, define the edge so there is a clear line where mulch should stop. This can be done by installing edging materials or simply cutting a neat edge in the soil. For a simple approach, use a sharp spade or edger tool to slice vertically down into the soil along the perimeter of the bed, about 2-3 inches deep. This creates a little trench or barrier that will help stop mulch from spilling out onto the lawn and keep grass from creeping into the bed. If you prefer a physical barrier, now is the time to install edging material.
Many South Florida gardeners use low plastic edging or brick borders to contain mulch, especially since heavy rains can otherwise wash it out onto walkways. Ensure any chosen edging is firmly in place and level. Additionally, take this moment to prune any overhanging branches or shrubs in the bed, so that you have clear access to spread mulch around them and they are not dropping leaves immediately on your fresh mulch.
Step-by-Step Mulch Installation Process
With all the planning and preparation done, the actual process of mulch installation is straightforward and even fun. It is often a satisfying task because the results are immediate. The garden transforms in appearance by the time you are finished. Here is a detailed, step-by-step guide to installing mulch in a South Florida landscape, from the first scoop to the final finishing touch. Each step is described methodically:
Step 1: Position the Mulch for Easy Access
Before spreading mulch, get it situated near the work area. If it is bagged mulch, carry the bags to the respective garden beds and place them in small piles or along the edges of the area. For example, for a long flower bed, drop a bag every few feet. This way, as you cut them open, you can dump directly without hauling material too far. If working with a bulk pile, use a shovel or pitchfork to fill a wheelbarrow with mulch, but do not overload it to the point it is hard to control. It is better to do more trips with manageable loads than to spill a massive heap halfway.
Wheel the mulch to the garden bed. One trick: lay a tarp or large piece of cardboard next to the bed and dump the wheelbarrow load onto it. This protects grass or pavement from stray mulch and allows you to slide or scoop the mulch off the tarp as needed. Essentially, the idea is to minimize the distance you have to carry handfuls or shovel-fulls of mulch. When you set everything up properly, it helps keep your energy up for doing the real work of spreading.
Step 2: Apply Mulch to the Beds
Now comes the rewarding part, spreading the mulch. If using bags, cut them open carefully and pour out the mulch onto the soil or fabric. For bulk, dump your wheelbarrow loads in small piles in the bed. It is often efficient to distribute several piles of mulch around the area. Place little “stations” of mulch that you will then rake out to meet each other. This prevents all the mulch from being dumped in one spot and having to be dragged a long way with the rake.
Once you have piles or a big dumped heap, use your bow rake to start pulling it toward you and pushing it outward, spreading it across the bed. Aim for a rough evenness at first. You can refine the depth in the next step. Make sure to get mulch between plants and around the base of shrubs, but avoid dumping a heavy pile right on top of a plant. If a plant is very low to the ground or a groundcover, you might need to do this more by hand, gently placing mulch around it.
Work systematically from one end of the bed to the other. The metal rake tines can be used upside-down for a gentler touch when needed, sort of like leveling concrete with a float. It can smooth the mulch without snagging landscape fabric or damaging plant roots. The goal is to roughly cover all intended areas with some mulch, not leaving any big bare patches, while not overshooting onto the lawn or sidewalks. Any stray pieces can be gathered later.
For larger open expanses, say under a tree with no plants, you can toss mulch with a shovel. Some people literally shovel it across the area and then rake to even it out. That can speed things up in open zones. Always be mindful of any fixtures. If there are sprinkler heads, light fixtures, or drip irrigation lines in the bed, cover them carefully or leave them accessible.
For example, if a sprinkler head is present, keep mulch away from directly on top of it. You might leave a couple-inch radius barely covered, so it does not hinder the sprinkler’s pop-up or spray. If drip irrigation tubing is snaking around plants, ensure it stays beneath the mulch for concealment, but you know its location to avoid piercing it with your rake.
Do not worry too much about the exact depth yet during this distribution stage. Just avoid creating any mulch mounds that are clearly way too deep. You will fine-tune the depth in the next step.
Step 3: Level the Mulch to the Desired Depth
With mulch loosely covering the area, it is time to level it out evenly. This is where you ensure that the coveted around 3-inch thickness across the bed. Take your rake, or your gloved hands, for precision work around plants, and spread or redistribute mulch as needed. If some areas look heaped higher than others, rake excess from those areas to the areas that look thin.
It can be helpful to occasionally measure the depth: stick a ruler or even just your finger down into the soil in a few spots to gauge how deep the mulch is. Three inches is roughly the height of a standard coffee cup or a bit shorter than the length of a credit card. If you find depths of 4-5 inches in spots, that is too much. Push that excess outward. Likewise, if some spot is barely 1 inch and you can see soil or fabric through the mulch, pull in more material to cover it.
While leveling, pay attention to the overall grade of the bed. Ideally, the mulch and underlying soil should slope slightly away from the bases of plants and structures. In practical terms, this means you might want a tad less mulch right up against a house foundation or a plant stem, and a tad more as you move away.
This subtle slope encourages water to flow outward rather than collecting at the base of a plant, avoiding rot, or against a house, avoiding moisture issues. You are not creating a steep hill by any means, just being mindful not to inadvertently create a bowl around a trunk.
Also, be sure the edges of the mulch layer are neat: where the bed meets the lawn or sidewalk, the mulch should taper down to ground level. Use the rake or a broom to keep a crisp line. A common mistake is leaving an edge of mulch that is too thick and sits up like a ledge. This will easily wash out or get kicked around. Instead, feather it out at the edges so it is less likely to be displaced. If you installed an edging barrier, make sure mulch fills right up to its inner side but not over the top of it.
At the end of this step, the mulch should be uniformly spread, at the right depth, and the area should already look transformed. A continuous blanket of rich-colored mulch gives the garden a fresh, tidy appearance.
Step 4: Keep Mulch Away from Plant Stems
This step is critical for the health of your plants: check the mulch around each plant stem and tree trunk. It is very important in any mulch installation, but especially in humid climates, that mulch is not piled against the stems or trunks. You might have heard of the term “mulch volcano,” which refers to those unfortunately common but harmful piles of mulch mounded like a volcano around a tree trunk.
While it might look like a lot of mulch was applied, it actually can slowly kill the plant by holding moisture against the bark, inviting rot, insects, and disease. Instead, think mulch donut: the tree trunk or plant stem is the donut hole, and the mulch is the donut, a ring around, but not touching, the center.
Practically, this means pulling mulch back about 2 to 4 inches away from small plant stems, and a bit more, around 6 inches or so, away from tree trunks. For small flowers or veggies, just ensure their crown, where the stem meets the roots in the soil, is not buried. They should emerge cleanly from the mulch without mulch pressed right up on them. For shrubs, leave a small breathing space around their base. And for trees, you should actually be able to see the root flare, the place where the trunk widens at the base into the roots, rather than having mulch covering it.
If you accidentally buried a trunk base earlier, now’s the time to fix it: use your hands or a rake to carefully scrape mulch away from the stem and redistribute it elsewhere. It should look like each plant has a little bit of personal space or a small ditch around it. This might seem like too much, but in South Florida’s moist environment, giving that breathing room prevents fungi from growing right on the stem and allows air to circulate. It also discourages insects like termites from having a hidden path to gnaw on woody stems.
Take a tour of the freshly mulched area and adjust the mulch around every plant you care about. It is a bit tedious, but your plants will thank you by staying healthier. Plus, it looks more professional. If you inspect gardens done by experts, you will notice they never have mulch touching the trunk.
Step 5: Final Grooming and Cleanup
With the mulch laid and properly placed, the last step is to tidy up. This involves a few simple tasks:
Smooth and Settle
Go over the bed one more time with the rake, very lightly, or your hands to ensure no clumps or uneven spots remain. The surface of the mulch can be gently smoothed for a uniform look, or you can fluff it slightly for a looser texture. That is a matter of personal preference. The idea is to leave it looking intentional and well-groomed.
Water the Mulch
Give the new mulch a quick, light watering. A fine spray from a hose or a sprinkler for a few minutes will do. The goal is not to drench the soil underneath. It should still be moist from earlier if you pre-watered, but to settle the mulch in place. Moisture helps the wood chips or straw start to mesh together so they are less likely to blow away with the wind. In South Florida, this might happen naturally with the next rain, but if the weather is dry or breezy, a manual sprinkle now helps. It also washes dust off the mulch, freshening its color.
Clean the Edges
Check along sidewalks, driveways, or lawn edges for any stray mulch pieces. Use a broom or blower to clear mulch off hard surfaces. Not only does this look cleaner, but dry mulch bits on concrete can be slippery or can stain if dyed. Along the grass edge, if any mulch spilled into the lawn, pick it up or rake it back into the bed. A clear division between mulch and grass looks sharp and prevents the lawnmower from sucking up wood chips later.
Collect Leftover Materials
If there are unused mulch bags, seal them and store them for future use, or give them a quick poke in the garden shed. South Florida humidity can seep into open bags and create mold, so try to keep spares dry. Gather any remaining landscape fabric scraps, the tarp from the driveway, which you can tip to pour any last bits of mulch into a wheelbarrow and use or dispose of, and put tools away. All those weeds and debris you removed earlier. Make sure they are bagged or composted appropriately so they do not cause a mess. And absolutely throw away any plastic bag remnants or ties. Litter has no place in your beautiful garden.
Mulch Maintenance in South Florida
Installing mulch is not a one-and-done task forever. Like many good things in gardening, it requires some upkeep. South Florida’s climate, with its intense UV rays, heavy rains, and rampant biological activity, means mulch can decompose or shift around faster than it might in cooler regions. Proper maintenance will keep the mulch effective and the landscape looking its best. Here is what the homeowner should do after the initial installation:
Regularly Check Mulch Depth and Condition
Every few months, take a little tour of the mulched areas. Look at the depth of mulch, is it still around 2-3 inches thick? In spots directly under the drip line of a roof or under a tree, heavy rain may have scattered the mulch, or it might have compacted down. If it is getting thin, less than 2 inches, plan to top it up soon with fresh mulch to continue protecting the soil. Also, observe the mulch’s condition: has it decomposed? In South Florida’s humidity, wood mulch can start breaking down relatively quickly, turning into a dark, soil-like compost. That is good for the soil, but it means the mulching function needs renewal.
If you grab a handful and it crumbles like dirt, that area might need new material sooner. Color fading is another sign. Many mulches start vibrant, especially dyed ones like red or black mulch, and bleach out to gray or brown after months of sun and rain. A fresh application can brighten the garden up again.
Rake the Mulch periodically
Mulch can settle and get compacted over time, especially finely shredded types. If it packs down too hard, it can start acting almost like a mat that water has trouble penetrating, and air can not circulate well. To avoid this, fluff the mulch occasionally. Using a rake or cultivator, gently loosen the top layer of the mulch, essentially turning it as one would compost. This is particularly important for shredded mulches that can form a dense layer. Doing this every couple of months is sufficient. It also gives you a chance to disturb any small weed seedlings trying to take root on the surface.
If you see any areas starting to grow mold or fungus on the mulch, sometimes you will notice a white filament or even something like a slime mold, which can look like dog vomit, gross but relatively harmless. Turning the mulch helps dry those out and break them up. South Florida’s moisture can encourage fungi, but they are part of the natural breakdown process. Just fluff them away if they become unsightly.
Keep Mulch Away from Structures and Pests
Maintenance time is a good time to ensure mulch has not shifted or been unintentionally moved too close to things it should not touch. For instance, around the house, do not allow mulch to pile up against the siding or foundation. Always maintain a gap if possible, or keep it shallow there. This is because wood mulch against wood siding could invite termites or wood rot, and even against concrete, it provides a path for insects. Termites are definitely a consideration in South Florida
While mulch does not cause termite infestations by itself, it can create a hospitable environment for them if it stays moist and in contact with your home. So be vigilant about that: pull mulch back a few inches from the house wall. If you have any wood structures, fences, or raised planter boxes, do the same check.
Monitor for Weeds and Remove Them Promptly
No mulch is 100% weed-proof. Eventually, some determined weeds will sprout, either from seeds that blow in and land on top of the mulch or sneaky runners creeping from the edges. The key is to pull weeds promptly when they are small. The good news: because of the mulch, their roots are usually shallow, and the soil beneath is soft, so they often come out easily. Regularly walking the garden and plucking a weed here or there is much easier than dealing with a huge overgrowth later.
If weeds are popping up in numbers, consider whether the mulch layer is thick enough or if your weed barrier, if any, has gaps. It might be a sign to lay down a bit more mulch in that spot. Quick action keeps the tidy look and maintains the low-maintenance benefit.
Replenish Mulch Annually
In South Florida, a common schedule is to replenish organic mulch about once a year. For some faster-decomposing mulches like straw or leaf mulch, it might be twice a year, whereas chunkier bark might last longer than a year. A good routine is to do a mulching refresh either at the beginning of the rainy season, late spring, or at the start of the dry season, fall.
Each timing has its own benefit: mulching in spring, say March or April, preps the garden for the scorching summer, conserves moisture, and keeps roots cooler. Mulching in fall, October or November, renews the layer before the cooler winter, and also after the heavy summer rains might have broken it down.
Some gardeners in Florida actually do a minor top-up in spring and a bigger one in fall. The key is to put down another inch or two to replace what is decomposed. Before doing so, you might rake aside the very decomposed bits or lightly mix them into the soil. There is usually no need to remove all old mulch. Just scrape off any large clumps of moldy material. Most of the old mulch can stay and become the under-layer for the new stuff.
Over time, if mulch builds up too deep, from repeatedly adding without removal, you may need to remove some, so you do not exceed 4 inches. But since it breaks down concurrently, many times you will find you add 2 inches, nature takes 2 inches, and it balances out.
Watch for Pest or Disease Issues
While mulch generally helps plants by improving their environment, it is wise to watch for any issues that might arise. In Florida’s environment, one such issue could be mulch attracting pests, for example, cockroaches sometimes hide in moist mulch, or termites, as mentioned. Regular garden inspections will let you catch any unwelcome critters early. If you turn the mulch and find termite tunnels or a colony, that might mean the mulch is too wet, or it is right up against a wood source. You might need to treat that area and replace the mulch with fresh, dry material.
Another issue: certain fungal diseases, like mushroom growth or artillery fungus, that shoot little black spores onto walls. can thrive in mulch. If mushrooms pop up after a rain, just knock them over and remove them if you like. They usually are not harmful to plants. Artillery fungus is more of a nuisance and tends to occur in very damp, wood-heavy mulches. If noticed tiny black dots stuck to surfaces around the bed, one might consider switching mulch type or ensuring the area gets a bit more sun to dry out, as those fungi prefer persistently wet, shady spots.
These cases are not extremely common, but a vigilant gardener is a successful gardener. Fortunately, a well-maintained mulch layer is largely trouble-free and continues to do its job with minimal effort.
A Lush South Florida Landscape Made Easy
After going through the planning, the step-by-step installation, and the maintenance routine, it is clear that mulch installation in South Florida is one of the most effective ways to nurture a garden. This detailed guide has shown how a gardener can confidently select the best organic mulch, prepare the yard, and lay down a perfect layer that will protect and beautify her landscape. The logistics, like measuring, sourcing, spreading, and caring for mulch, are now demystified. A once plain or struggling garden bed can be transformed in a day into a moisture-saving, weed-reducing, eye-catching foundation for plants to thrive.
Mulching is truly a sustainable landscaping practice. It recycles natural materials, reduces the need for chemical weed killers, conserves water, which is environmentally and financially smart in a place where irrigation is often needed, and fosters healthier plants that are more resilient to pests and diseases. By sticking to the step-by-step process outlined here, anyone can achieve professional-quality results. Remember, consistency is important: maintain that mulch, refresh it annually, and enjoy the many benefits it brings season after season. In fact, mulch installation in South Florida is a strategic part of HOA management and landscaping maintenance.
For those readers who might be feeling a tad overwhelmed or simply short on free time, there is good news beyond DIY mulching. One can still reap all the rewards of a well-mulched landscape without breaking a sweat, thanks to services like our very own. In fact, we are passionate about sustainable gardening and even offer a free recycled mulch service to local South Florida homeowners in exchange for a small monetary contribution.
This means that a gardener can have high-quality recycled organic mulch, such as wood chips made from local tree trimmings, a beautiful, eco-friendly mulch delivered by professionals, without the typical cost of buying dozens of bags. The small contribution helps support the program and covers the basics, but the mulch material is provided as part of our commitment to green practices and community beautification. It is our way of making it easy for anyone to have a mulched, healthy garden, even if they do not have the time or resources to do it all solo.
The South Florida gardener has every reason to embrace mulching. It is straightforward, it is effective, and as we have tried to convey with a bit of confident flair, it can even be an enjoyable and empowering process. So go ahead, envision that gorgeous garden with rich organic mulch framing every plant. With this guide, achieving it is no longer a mystery but a matter of following steps and making smart choices. Happy mulching!